
Guide
VIVOSUN Fan and Filter Setup: A Step-by-Step Build for Your Tent
A tent with a light and no ventilation turns into a warm, damp box within hours. The fix is a small system: an inline fan pulling air out through a carbon filter, a way for fresh air to get in, and a clip fan moving air around the plants. Get the order and placement right once and it runs itself.
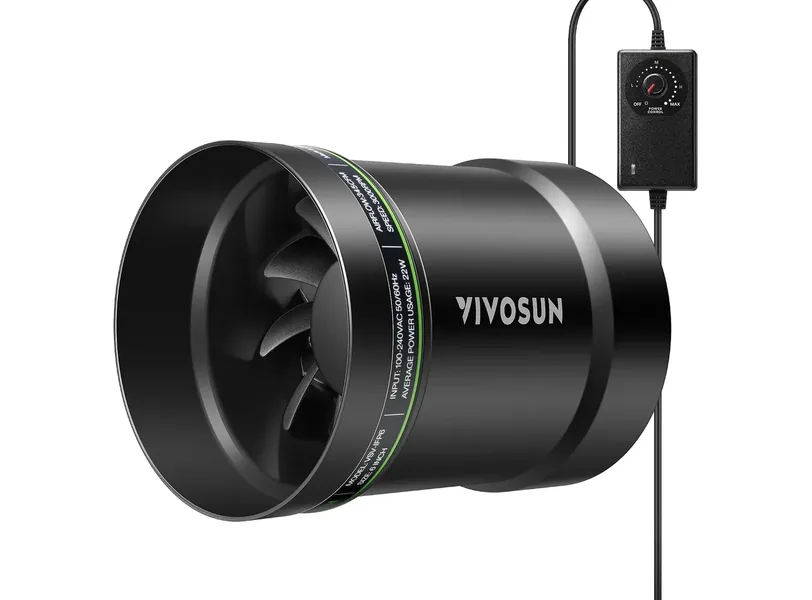
This walk-through uses VIVOSUN's own setup steps and ventilation schedule, applied to the P6 6" Inline Fan and 6" Carbon Filter, the pairing VIVOSUN's chart points to for a 4x4 tent. The same steps work with a 4-inch fan in a smaller tent. Fan and filter specs come from VIVOSUN's product pages.
What you need before you start
- An inline fan sized to the tent. VIVOSUN pairs a 4-inch fan with 2x2, 3x3 and 2x4 tents, a 6-inch with a 4x4, and an 8-inch with a 5x5 and up. Our grow tent sizes guide has the full chart.
- A carbon filter with the same flange size, if you need odor control.
- Ducting and clamps in the same diameter. Keep the run short.
- A clip fan for the canopy.
- A thermometer and hygrometer so you can see what the system is doing.
Step 1: Hang the carbon filter at the top of the tent
Heat rises, so the warmest, most humid air collects near the roof. That's where the exhaust side belongs. Hang the filter from the top bars with the two straps that come with VIVOSUN's filter. The 6-inch canister is 8.85 × 8.85 × 15.75 inches and weighs 6.5 pounds, so check that your top bar is rated for it; VIVOSUN's tent top bars are rated to 100 pounds each.
Leave the pre-filter cloth on. It sits around the outside of the canister and keeps dust off the charcoal.
Step 2: Connect the fan to the filter
The filter goes first in line, then the fan, so the fan pulls air through the carbon. Connect the filter's flange to the fan's intake with a short length of duct, or mount the fan directly on the flange if space allows. Make sure the fan blows toward the outlet, away from the filter.
The P6 is rated up to 345 CFM and the 6-inch filter up to 413 CFM, so the filter has headroom over the fan by design.
Step 3: Run the exhaust duct out of the tent
From the fan's outlet, run ducting through a top port and out of the grow area, ideally to a window, vent or another room. VIVOSUN's setup steps put the exhaust fan at the top of one end of the tent, with the air inlet at the bottom of the opposite end.
Every 90° bend matters. VIVOSUN estimates each one adds 40 to 60% to the airflow your fan needs, so route the duct as straight as you can and keep it short.
Step 4: Give fresh air a way in
Air can only leave as fast as it can enter. Open the low vents or ports at the opposite end of the tent from the exhaust. If passive vents aren't enough, VIVOSUN suggests adding an intake fan the same size as the exhaust fan or one size smaller to improve air exchange.
Cover inlet openings with light-proof mesh or flaps, and seal gaps around ducts so light doesn't leak in.
Step 5: Add a clip fan at canopy height
The inline fan swaps the air; a clip fan keeps it from sitting still between the leaves. Clamp it to a tent pole near canopy height and aim it so the air moves across the plants.
The AeroWave A6 offers two speeds, 90° auto oscillation and a 120° manual tilt. The AeroWave E6 Gen2 adds a 320 CFM EC motor, 5-level oscillation, a 3-cycle timer and app control through a GrowHub.
Step 6: Seal up and set the speed
Zip the tent closed so all the air exchange happens through the system, not through gaps. Then run everything for a few hours and watch your readings. VIVOSUN's targets for most plants are 70 to 85°F and 50 to 70% humidity.
Use the fan's speed control to land in that range. The P6 has a stepless dial, so you can make small changes.
How to run the system day to day
VIVOSUN's schedule depends on the light cycle and the growth stage.
While the lights are on, run the inline fan continuously and set the speed by temperature and humidity. Run oscillating fans at full speed.
After the lights go off, wait about 20 minutes, then step the inline fan down gradually over roughly 3 hours until it's off, or leave it running on low if you'd rather not adjust it daily. Slow the clip fans down but leave them running all night.
By stage:
- Seedlings: gentle airflow 24 hours a day. Don't aim strong air directly at young plants.
- Vegetative growth: inline fan at full speed with the lights on; firm, direct canopy airflow helps build sturdier stems.
- Flowering: keep air moving through the dark period too, and lower the exhaust only as temperature and humidity allow.
Quick fixes when the readings are off
- Over 85°F with the lights on: turn the fan up. If it's already at full speed, shorten the duct run, remove bends, or move up a fan size.
- Humidity over 70% with the lights on: same steps as heat first. If the room outside the tent is humid too, the exhaust is only swapping damp air for damp air; that's when a tent dehumidifier like the AeroDrain D12 earns its place. It removes up to 12 liters a day and is recommended for tents up to 5x5 feet.
- Smell escaping: check that the filter is first in line and every joint is clamped. VIVOSUN's filter has a reversible flange and base; turning the canister around exposes fresh carbon to the airflow.
- Seedlings drying out or getting battered: too much direct airflow; VIVOSUN warns that strong airflow can cause moisture loss and physical damage in young plants. Turn the clip fan down or aim it away from the plants.
Why the fan's rated CFM isn't the full picture
The CFM printed on a fan is measured with nothing attached. A carbon filter, ducting and bends all add resistance, and VIVOSUN's guide says to choose a fan that still gives enough airflow once all of that is attached. That's why VIVOSUN plans for roughly 60% more capacity when a carbon filter is fitted, and why a short, straight duct run is the easiest upgrade you can make.
For the rest of VIVOSUN's tent airflow and humidity gear in one place, see our VIVOSUN review.